Chapter 2
Button Language
Simple button clicks, holds, and the difference between Locked and Ready.
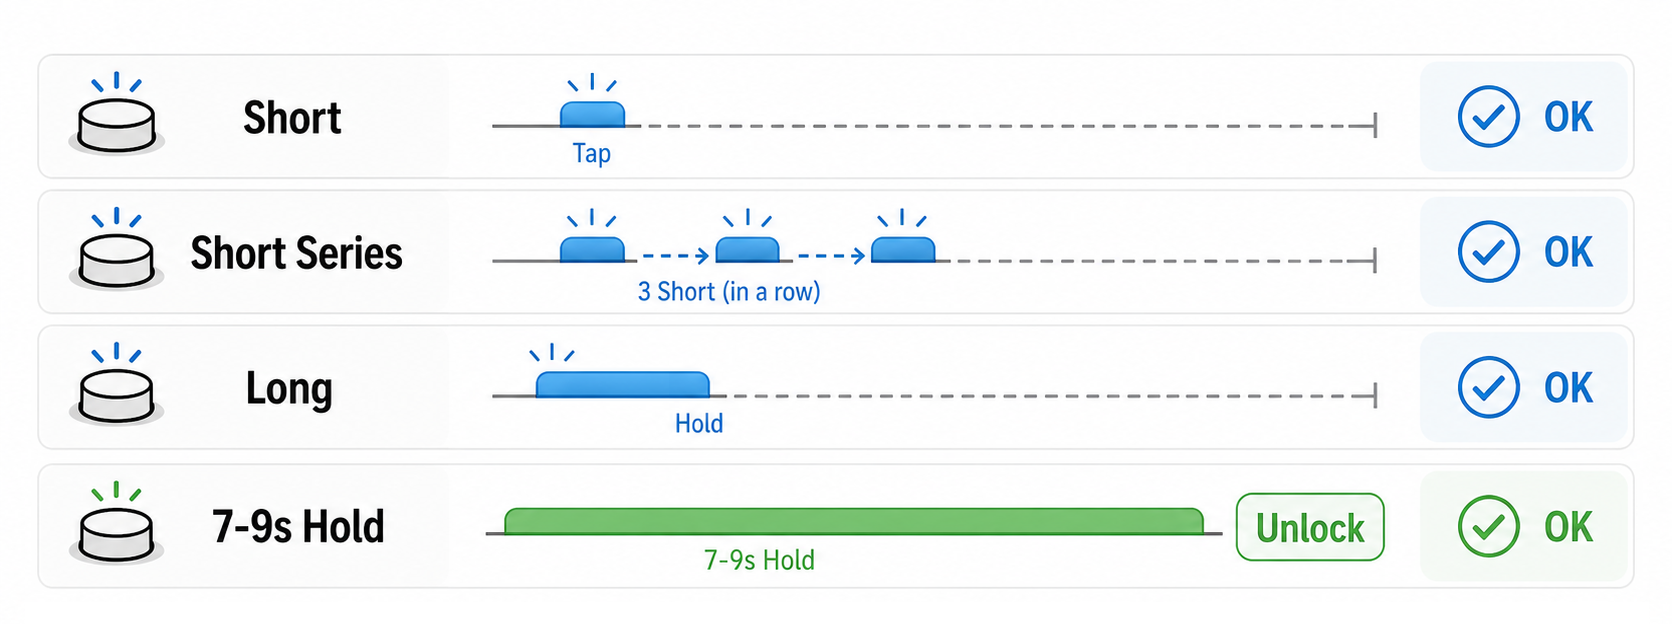
The control system uses one physical button. The main idea is simple: click quickly, click several times, or hold the button.
Button Presses
| Press | Do this | What it is for |
|---|---|---|
| Short tap | Click once and let go. | Shows charge when the device is idle. |
| Several short taps | Click the number shown in the guide, then stop. | Used for commands like 2 taps to start or 3 taps to go back. |
| Long press | Hold for about 2 seconds, then let go. | Stops an active mode. Four long presses unlock the device. |
| 4-7 second hold | Hold the button for 4-7 seconds, then let go. | Starts RF Deactivator from Ready. |
| 7-9 second hold | Hold the button for 7-9 seconds, then let go. | Unlocks the device from Locked. |
Locked And Ready
The device is delivered Locked. In this state it cannot start a working mode by accident.
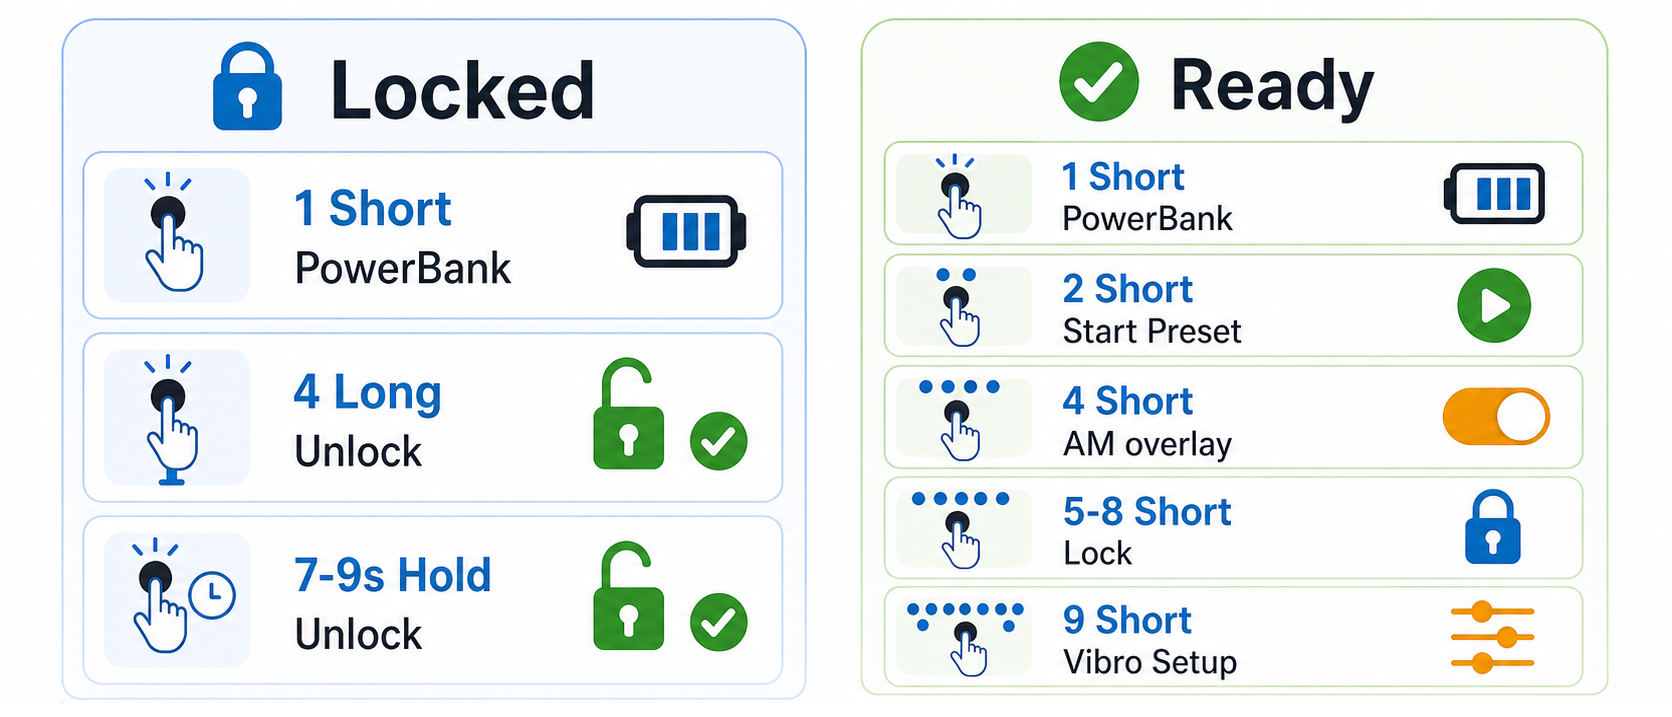
From Locked or Ready, one short tap only wakes or updates the powerbank indicator. It does not start a mode. This charge-display tap is for idle states only; it is not used while a mode is running or inside Vibro Setup.
From Ready, 2 short taps start the selected operating mode, 4 short taps turn the mode 1 extra option on or off, and 9 short taps open Vibro Setup.
Quick Commands
| Command | Action |
|---|---|
| Unlock | 4 long presses, or one 7-9 second hold. |
| Start | 2 short taps from Ready. |
| Stop | 1 long press while a normal mode or special mode is running. |
| Lock | 5-8 short taps from Ready or Active. |