Chapter 3
Modes
Why there are five modes, how to try them, and how special modes are different.
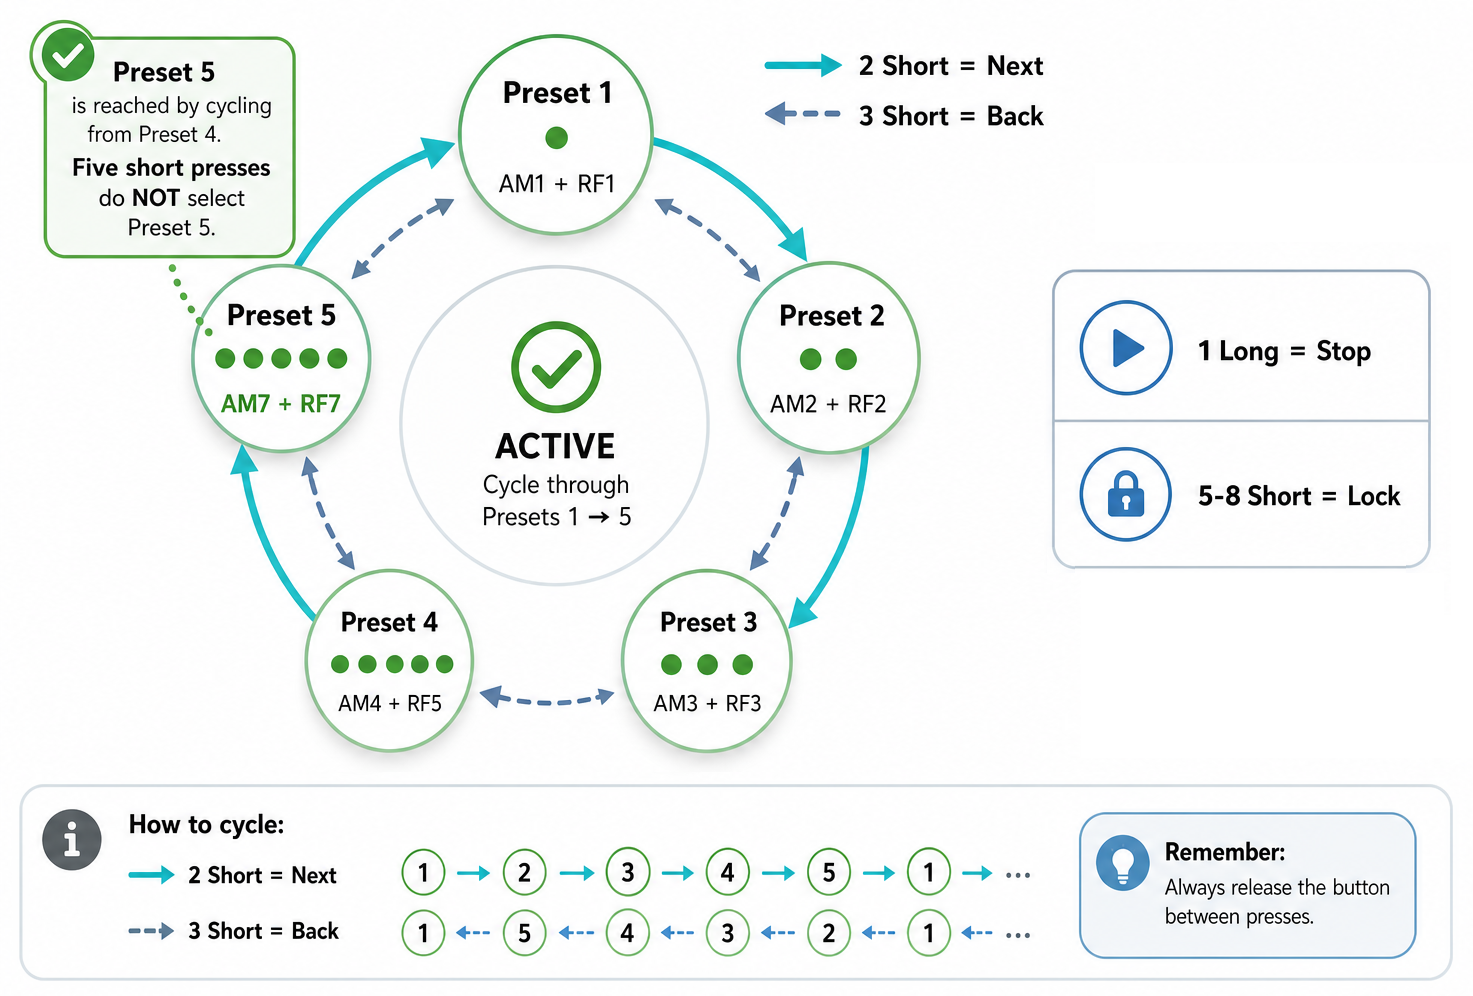
The device has five normal modes. Think of them as five different ways the device can work. You do not need to understand what is inside each mode; just try them in order.
What The Modes Are For
Different gate systems can react differently. Some are simple, and some try to ignore repeated noise automatically. A mode that works well in one place may not be the best choice somewhere else.
We put the most useful ways of working into one device and arranged them as Mode 1 through Mode 5. Start with Mode 1. If your own test tag still reacts during authorized testing, try Mode 2. If needed, continue to Mode 3, Mode 4, and Mode 5. Modes 1 and 2 usually cover most normal situations.
The mode number is not a power level. Mode 5 is not simply stronger than mode 1. It is just a different way of working.
This is the point of having modes: you do not need to carry several different devices. The main methods are already inside this one device; you only switch the mode.
Normal Modes
| Mode | When to try it | Feedback |
|---|---|---|
| 1 | Start here. This is the usual first choice. | 1 short pulse |
| 2 | Try this if mode 1 is not enough. | 2 short pulses |
| 3 | Try this after mode 2. | 3 short pulses |
| 4 | Try this after mode 3. | 4 short pulses |
| 5 | Last normal mode in the cycle. | 5 short pulses |
While a normal mode is active, 2 short taps move forward and 3 short taps move backward.
Extra Option For Mode 1
This is an optional AM extra layer for mode 1. Most users do not need it every day, so it is kept as a separate switch.
It was added for some Chinese-made AM systems. Some of these gates are made to look very similar to Sensormatic-style equipment, but their tag detection can work differently. Because of that, normal mode 1 may not be the best match for them.
The extra layer slightly changes how mode 1 works. We did not make this change permanent because these systems are not common everywhere. They are seen more often in parts of Asia and South America, and much less often in everyday European use. Keeping it separate lets advanced users try it when they actually need it, without changing the normal behavior for everyone else.
Use it only if you recognize this type of AM system and normal mode 1 is not enough during your own authorized testing.
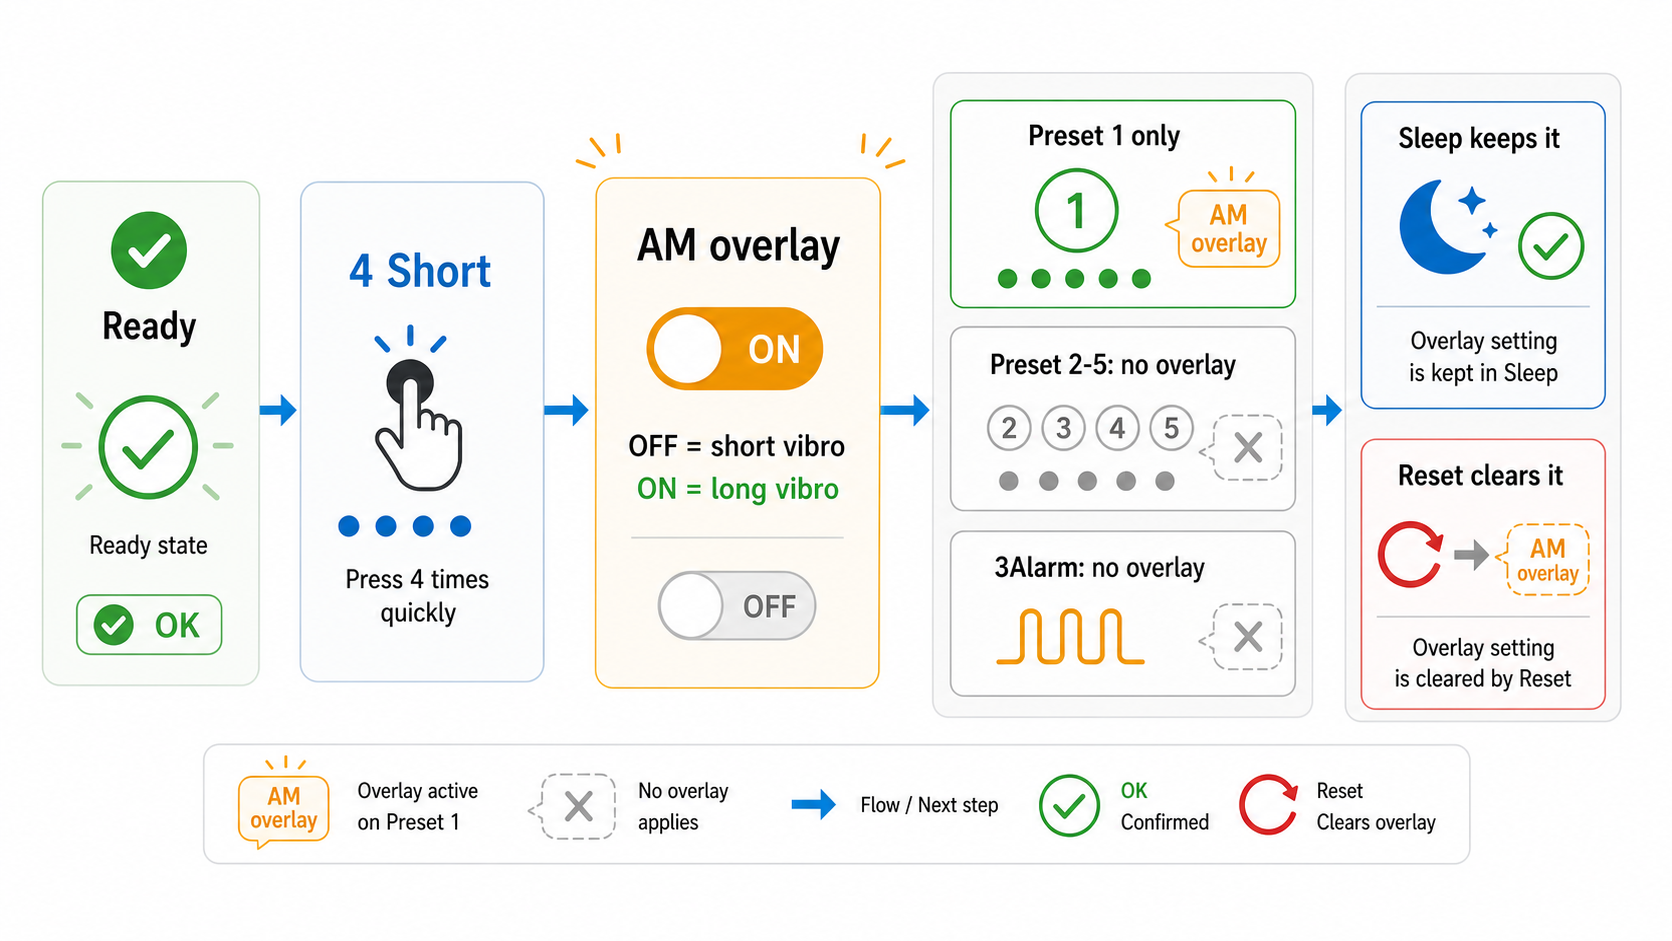
- Turn it on or off with 4 short taps from Ready.
- It changes mode 1 only.
- When it is active, mode 1 gives a slightly longer repeating vibration.
- Modes 2-5 and special modes stay unchanged.
- Sleep remembers this setting.
Special Modes
3Alarm and RF Deactivator are separate tools. They are not mode 6 or mode 7, and you do not reach them by scrolling through the normal mode cycle. Use them only for authorized testing.
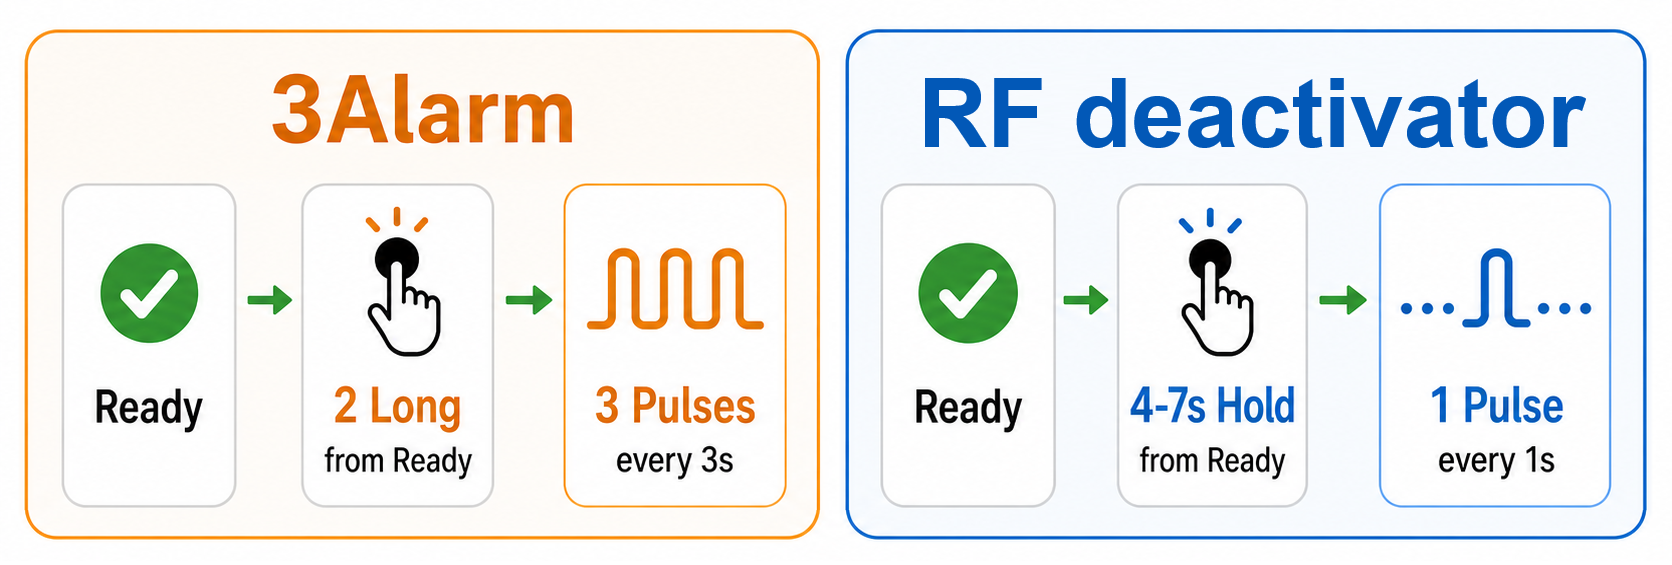
| Mode | Start from Ready | Feedback while running | Stop |
|---|---|---|---|
| 3Alarm | 2 long presses | 3 pulses about every 3 seconds | 1 long press |
| RF Deactivator | Hold 4-7 seconds | 1 pulse about every 1 second | 1 long press |
3Alarm
3Alarm imitates the field pattern of security gates. It is useful for testing tags that have their own active alarm electronics. Some of these tags listen for the gate field and start beeping when they detect it.
Start 3Alarm with 2 long presses from Ready. Bring the device close to the test tag in an authorized setup. If the tag has this active alarm circuit, it should react with its own sound, similar to how it reacts near a gate.
While 3Alarm is running, the device gives 3 vibration and LED pulses about every 3 seconds. This repeated triple feedback tells you the mode is still active.
RF Deactivator
RF Deactivator is a passive test function for soft RF labels. Start it with a 4-7 second hold from Ready.
While it is running, the device gives 1 short vibration and LED pulse about every 1 second. This frequent single pulse means RF Deactivator is active.
Because this function is passive, the device cannot confirm whether a label was actually deactivated. Keep the label very close to the back cover side of the powerbank during authorized testing. Very short distance is the most reliable; at larger distances, reliability can drop and the result must be checked separately.